
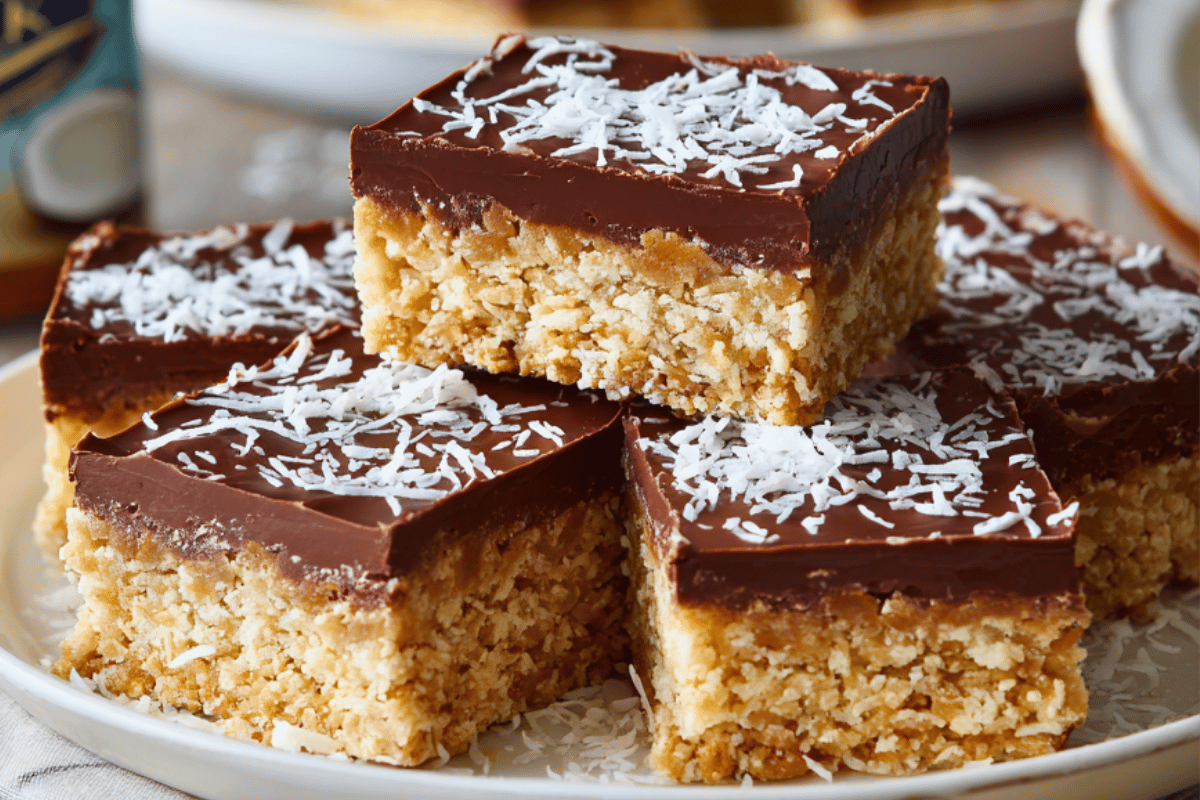
Few recipes represent the simplicity and charm of Australian home baking like the Condensed Milk Biscuit Slice. Often passed down through generations, this no-bake classic is a staple for school lunchboxes, afternoon teas, and “bring a plate” events. Combining crushed sweet biscuits, sweetened condensed milk, and coconut, it creates a chewy, fudgy slice with nostalgic flavour and texture.
What makes this recipe so wonderful is its flexibility. You can add dried fruit, chocolate topping, or even a hint of spice, depending on your preference. And because it requires no baking, it’s perfect for hot days or quick prep when you need something delicious in a hurry.
Whether you’re an experienced baker or just starting out, this slice is an easy win. Let’s dive into how to make this timeless Aussie favourite, packed with coconut goodness and sweet, milky richness.
Ingredients:
Base:
-
250g plain sweet biscuits (e.g. Arnott’s Marie or Nice), crushed
-
1 cup (90g) desiccated coconut
-
½ cup (75g) sultanas or chopped dried apricots (optional, for added texture and sweetness)
-
125g unsalted butter
-
1 tin (395g) sweetened condensed milk
-
1 teaspoon vanilla extract
Topping (Optional but Recommended):
-
200g milk or white chocolate, melted
-
1 tablespoon (15ml) vegetable oil or cream (makes slicing easier and gives a glossy finish)
-
Extra desiccated coconut or crushed biscuits for garnish
Preparation:
Step 1: Crush the biscuits
Place the sweet biscuits in a food processor and pulse until they become fine crumbs. Alternatively, you can place them in a zip-lock bag and crush them with a rolling pin. Some larger crumbs add texture, so don’t overdo it.
Step 2: Mix dry ingredients
In a large mixing bowl, combine the crushed biscuits, desiccated coconut, and dried fruit (if using). Mix well to distribute the ingredients evenly.
Step 3: Melt the butter and combine with condensed milk
In a small saucepan over low heat, melt the unsalted butter. Once melted, remove from heat and stir in the condensed milk and vanilla extract. Mix until smooth and combined.
Step 4: Combine wet and dry
Pour the wet mixture over the dry ingredients. Use a wooden spoon or spatula to stir until everything is evenly coated. The mixture should be sticky and able to hold together when pressed.
Step 5: Press into tin
Line a 20cm x 20cm square tin or slice pan with baking paper, ensuring the sides hang over for easy removal later. Transfer the mixture into the tin and press down firmly to create an even layer. Use the back of a spoon or flat-bottomed glass for a smooth finish. Place the base in the fridge to chill for at least 1 hour.
Step 6: Prepare the optional chocolate topping
While the base is chilling, melt your chocolate in a heatproof bowl over a saucepan of simmering water (double boiler method), or in the microwave in short bursts, stirring between each. Stir in the vegetable oil or cream to make the chocolate glossy and easier to slice later.
Step 7: Spread topping and garnish
Once the base is set, pour the melted chocolate over the top and spread evenly. Sprinkle with extra coconut or crushed biscuits for added texture and visual appeal. Return the slice to the fridge and chill for another 1–2 hours, or until the topping is firm.
Step 8: Slice and serve
Use the baking paper to lift the slice out of the tin. Cut into squares using a sharp knife, warming the blade in hot water and drying it before slicing for clean edges. Serve chilled or at room temperature.
Variation:
-
Chocolate Swap: Use dark chocolate for a more intense flavour, or swirl white and milk chocolate together for a marbled effect.
-
Fruit-Free: Omit dried fruit for a smoother texture, or replace with mini marshmallows for a rocky road twist.
-
Nutty Addition: Add ½ cup chopped walnuts, almonds or pecans to the base for crunch.
-
Spiced Base: Add ½ teaspoon of cinnamon or mixed spice for a warm, fragrant flavour.
-
Lemon Zest: Add zest from 1 lemon to the base for a subtle citrus tang that cuts through the sweetness.
Cooking Note:
This slice is no-bake, but requires ample chilling time to set properly. The condensed milk acts as a binder, and the chocolate topping solidifies best when chilled. For the smoothest chocolate finish, make sure your base is cold before pouring over the topping.
If you’re making this in warm weather, keep everything refrigerated until ready to serve to avoid the topping softening or separating.
Serving Suggestions:
-
Cut into 4×4 or 5×5 squares and serve chilled on a decorative plate.
-
Serve with tea, coffee, or cold milk for a comforting afternoon treat.
-
Add a scoop of vanilla ice cream and serve as a plated dessert.
-
Include in lunchboxes as a special homemade snack.
-
Wrap in wax paper and tie with twine for edible gifts or holiday trays.
Tips:
-
Use fresh coconut: Old or rancid coconut will ruin the flavour. Store unopened coconut in the pantry and once opened, refrigerate in an airtight container.
-
Grease your spatula: When pressing the base, a lightly greased spatula can help smooth it out without sticking.
-
Warm knife for slicing: Dipping your knife in hot water and drying it before slicing makes neat, clean cuts through the chocolate topping.
-
Chill thoroughly: Rushing the chilling stage may result in a crumbly or loose base.
-
Layer foil under baking paper: For easier lifting and slicing stability.
Storage:
-
Refrigerator: Store in an airtight container in the fridge for up to 1 week.
-
Freezer: Wrap individual squares in baking paper and place in a freezer-safe container. Freeze for up to 2 months. Thaw in the fridge overnight before serving.
-
Do not store at room temperature in warm weather, as the chocolate topping may melt and the slice can become too soft.
Prep Time & Total Time:
-
Prep Time: 20 minutes
-
Chilling Time: 2–3 hours
-
Total Time: 3 hours 20 minutes (including chilling)
Nutritional Information (per serving, based on 16 slices):
-
Calories: 220
-
Protein: 2.5g
-
Sodium: 65mg
-
Fat: 12g
-
Carbohydrates: 25g
-
Sugars: 18g
-
Fibre: 1g
(Nutritional values may vary depending on toppings and ingredients used.)
FAQs:
Q: Can I make this slice without chocolate topping?
A: Absolutely. The base is rich and flavourful enough on its own. You can simply chill, slice, and serve without adding chocolate.
Q: Can I use gluten-free biscuits?
A: Yes, simply substitute with a gluten-free brand of plain sweet biscuits. Check labels to ensure they are gluten-free certified.
Q: What’s the best way to crush biscuits without a processor?
A: Place biscuits in a large zip-lock bag and crush with a rolling pin. A few bigger crumbs add nice texture.
Q: Can I add cocoa powder to the base?
A: Yes! Add 1–2 tablespoons of cocoa powder for a chocolatey twist to the biscuit mixture.
Q: Can I use sweetened shredded coconut instead of desiccated?
A: You can, but desiccated coconut offers a finer texture and blends better. Shredded coconut will give more chew and texture.
Q: Is this suitable for kids’ lunchboxes?
A: Yes, this makes a fantastic lunchbox treat. For nut-free schools, ensure no nuts are added in variations.
Conclusion
The Condensed Milk Biscuit Slice is a classic no-bake treat that combines ease of preparation with irresistible flavour. Whether you keep it traditional with a coconut-studded base or elevate it with a silky chocolate topping, it never fails to impress. It’s perfect for those busy days when you want a dessert that looks (and tastes) like you spent hours in the kitchen – even when you didn’t.
With only a few pantry staples and some chilling time, you can enjoy a chewy, sweet, and delicious slice that the whole family will love. Add it to your baking rotation and share a slice of simple Australian goodness with everyone around you.
Print
Condensed Milk Biscuit Slice
- Total Time: 3 hours 20 minutes (including chilling)
Ingredients
Ingredients:
Base:
-
250g plain sweet biscuits (e.g. Arnott’s Marie or Nice), crushed
-
1 cup (90g) desiccated coconut
-
½ cup (75g) sultanas or chopped dried apricots (optional, for added texture and sweetness)
-
125g unsalted butter
-
1 tin (395g) sweetened condensed milk
-
1 teaspoon vanilla extract
Topping (Optional but Recommended):
-
200g milk or white chocolate, melted
-
1 tablespoon (15ml) vegetable oil or cream (makes slicing easier and gives a glossy finish)
-
Extra desiccated coconut or crushed biscuits for garnish
Instructions
Place the sweet biscuits in a food processor and pulse until they become fine crumbs. Alternatively, you can place them in a zip-lock bag and crush them with a rolling pin. Some larger crumbs add texture, so don’t overdo it.
In a large mixing bowl, combine the crushed biscuits, desiccated coconut, and dried fruit (if using). Mix well to distribute the ingredients evenly.
In a small saucepan over low heat, melt the unsalted butter. Once melted, remove from heat and stir in the condensed milk and vanilla extract. Mix until smooth and combined.
Pour the wet mixture over the dry ingredients. Use a wooden spoon or spatula to stir until everything is evenly coated. The mixture should be sticky and able to hold together when pressed.
Line a 20cm x 20cm square tin or slice pan with baking paper, ensuring the sides hang over for easy removal later. Transfer the mixture into the tin and press down firmly to create an even layer. Use the back of a spoon or flat-bottomed glass for a smooth finish. Place the base in the fridge to chill for at least 1 hour.
While the base is chilling, melt your chocolate in a heatproof bowl over a saucepan of simmering water (double boiler method), or in the microwave in short bursts, stirring between each. Stir in the vegetable oil or cream to make the chocolate glossy and easier to slice later.
Once the base is set, pour the melted chocolate over the top and spread evenly. Sprinkle with extra coconut or crushed biscuits for added texture and visual appeal. Return the slice to the fridge and chill for another 1–2 hours, or until the topping is firm.
Use the baking paper to lift the slice out of the tin. Cut into squares using a sharp knife, warming the blade in hot water and drying it before slicing for clean edges. Serve chilled or at room temperature.
- Prep Time: 20 minutes
- Chilling Time: 2–3 hours
Nutrition
- Calories: 220
- Sugar: 18g
- Sodium: 65mg
- Protein: 2.5g